Our Key Takeaways
- Ensure safety by turning off power and using a tester to check the outlet.
- Remove the old outlet and prepare wires for the new installation.
- Securely attach wires to the new outlet and test functionality after installation.
Ensuring Electrical Safety
Power Disconnection Procedures
Before embarking on any electrical maintenance, such as replacing an outlet, disconnecting the electrical supply is imperative to prevent the hazard of electrocution. Locate your circuit breaker box and identify the breaker that controls the electricity to the area you'll be working on. Switch off that breaker to cut power to the outlet.
Confirming Electrical Isolation
Once you have turned off the breaker, it’s crucial to verify that the power is indeed off. Plug in a device that you know is working, such as a lamp, into the outlet. If the lamp doesn't turn on, you can be more confident that the outlet is not receiving power. Do this for all plugs associated with the outlet to ensure complete power isolation.
-
Power Disconnection Checklist:
- Locate the appropriate circuit breaker.
- Switch off the breaker.
- Label the breaker if not already labeled for future reference.
-
Power Verification Steps:
- Insert a functioning lamp into the outlet.
- Confirm the lamp does not illuminate.
- Check both the top and bottom plugs if it's a duplex outlet.
Proceed with the electrical task only after taking these precautions to ensure your safety.
Necessary Equipment and Supplies
For the task of swapping out an aged electrical outlet, ensure you have the following:
- New electrical outlet
- Wire cutters
- Flathead screwdriver
- Wire strippers
- Pliers
- Phillips head screwdriver (may be required)
- Device to verify power absence (e.g., a simple tester)
Before commencing, cut off the electricity supply at your breaker box to avert any electrical hazards. Confirm power outage by plugging a known functioning light into the outlet.
Here's a checklist to guide you through the process:
- Secure the room's supply: Locate and shut off the outlet's breaker.
- Confirm electricity disconnection: Utilize your checking device—no light or activity indicates a safe environment.
- Outlet cover removal: With your flathead screwdriver, remove the plate.
- Detach the outlet: Unscrew the retention screws and gently extract the outlet.
- Wire detachment: If necessary, snip the wires near the outlet with wire cutters.
- Wire preparation: Strip approximately a quarter-inch of insulation from each wire end.
- Wire attachment: Create small hooks on the wire ends, secure them to the replacement outlet screws, and tighten.
- Insulation safety: Keep exposed wires concealed; trim any excess.
- Grounding: Affix the ground wire to the designated screw, typically colored green.
- Final steps: Place the wires back into the wall, secure the new outlet, and install a fresh cover plate.
- Power restoration: Turn on the breaker and test your new outlet.
Performing this procedure carefully will ensure a safe and successful replacement of your electrical outlet without the risk of an accidental shock.
Replacing the Existing Electrical Outlet
Taking Off the Outlet Cover
To start, remove the cover of the electrical outlet using a slotted screwdriver. Simply unscrew it to access the actual outlet.
Unbolting and Pulling Out the Outlet
Next, detach the outlet from the electrical box. It’s held in place by two screws, one at the top and another at the bottom. Use your screwdriver to remove these, and then gently pull the outlet away from the wall for further work.
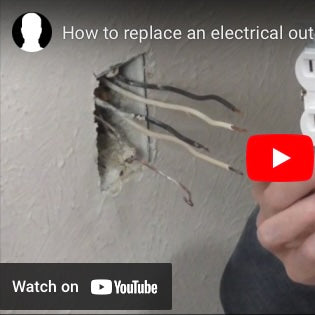
Disconnecting the Circuit Wires
Once the outlet is accessible:
-
Black Wires (Hot):
- If release mechanisms are non-functional, use wire cutters to snip them as close to the outlet as possible.
-
White Wires (Neutral):
- Similarly, cut the neutral wires if quick-release doesn't work.
-
Ground Wire (Bare or Green):
- Loosen the ground screw a few turns and remove the wire.
Next, prepare the wires for connection to the new outlet by stripping approximately a quarter inch of insulation off the ends, ensuring clean exposure for a secure connection.
Outlet Installation Process
Wire Preparation
Before interacting with the outlet, ensure your safety by confirming the electricity is shut off. Confirm no power is flowing by using a reliable device like a light or a tester. Then, remove the faceplate with a flathead screwdriver and unscrew the outlet from the wall. Once exposed, trim the existing wires as close to the old outlet as possible.
Attaching New Wires
Take the freshly exposed wires and strip roughly a quarter-inch of insulation off each end. Then, craft a hook at the end of each wire using your pliers. Connect your black (hot) wires to the brass screws and your white (neutral) wires to the silver screws of the new outlet. Ensure no bare wires protrude beyond the screws to maintain a safe setup.
Ground Wire Attachment
The importance of securing the ground wire cannot be overstated for your protection. Loosen the green grounding screw on your new outlet, attach the ground wire securely and retighten. This step helps to reduce the risk of electrical shock.
Outlet Insertion
Carefully push the wires and new outlet back into the wall, taking care not to pinch or damage them. Once the wires are in place, use the provided screws to fasten the outlet to the wall. Attach a new faceplate to give your outlet a fresh appearance and to keep it secure.
Completing the Installation Process
Securing the Socket Faceplate
Now that the socket is free from the wall, it's time to secure the faceplate. Using your slotted screwdriver, simply line up the plate and tighten the flathead screws at the top and bottom. Make sure it sits snug against the wall without any wiggle room.
Conducting a Functionality Check
Once the cover is in place, it's crucial to test the outlet's functionality. Restore power at the circuit breaker, then insert a device, such as a lamp, into the outlet to confirm power is appropriately flowing. Additionally, ensure the device remains stable when plugged in, signaling a secure connection.
Final Thoughts on Outlet Replacement
In tackling electrical projects like outlet replacement, safety is paramount. Remember, before initiating any repair, you must disconnect the power supply by switching off the appropriate circuit breaker. Determining the correct breaker is critical, as you want to avoid any electrical hazards—personal experience suggests being shocked is not a pleasant ordeal.
Your toolset for this endeavor should include a new outlet, wire cutters, both flat and Philips head screwdrivers, wire strippers, pliers, and a testing device to confirm the absence of electrical current. Over time, outlets can wear out, leading to loose connections and potential dangers such as exposed plug prongs.
Once the power is verified to be off, start by removing the old outlet's cover plate, then proceed to unscrew the outlet itself. If wires are not easily released due to age or corrosion, be prepared to cut them as close to the old outlet as possible, ensuring to strip about a quarter inch of insulation from the wire ends to facilitate reattachment.
Hook the exposed wires onto the corresponding screws of the new outlet—black wires to the 'hot' side and white wires to the 'neutral' side. It's essential to loop and tighten the wires securely, avoiding any excessive bare wire which could pose a risk. Attach the ground wire to its designated green screw. With all wires connected, carefully tuck them back into place and secure the new outlet to the wall.
Upon restoring power, test the new installation with a device to ensure functionality. Not only will the new outlet hold the plugs firmly, but you'll also benefit from the enhanced safety and reliability of your electrical system.
Before embarking on this task, make sure you understand each action's significance, as a simple job like replacing an outlet can quickly become perilous if done improperly. Stay vigilant about your safety, and don't hesitate to consult with a professional if there's any uncertainty.
Replacing an Electrical Outlet
Replacing an electrical outlet is a straightforward but critical home improvement task. Ensuring the process is done safely is paramount to prevent a hazardous voltage surge through your body, a highly unpleasant experience.
Before embarking on this task, ensure you have the necessary tools: a new electrical outlet, wire cutters, a flathead screwdriver, wire strippers, pliers, perhaps a Philips head screwdriver, and a device to test for electrical power.
With time, outlets may become worn, causing plugs to fit loosely, which is a safety concern due to exposed connections. Addressing this by installing a fresh outlet can rectify the issue.
Step 1: Power Off Firstly, power to the outlet must be disconnected by switching off the correct breaker. If there is uncertainty regarding which breaker controls which outlet, a methodical check is required — switch a breaker off, verify the power status of the outlets, and repeat until the right one is identified.
Step 2: Check for Safety Once you've switched off the breaker, double-check that no current is flowing through the outlet. Insert a functioning lamp or tester into both slots to confirm this.
Step 3: Remove the Outlet Cover Using your flathead screwdriver, remove the outlet cover. Then, unscrew the top and bottom screws of the outlet itself.
Step 4: Detach the Wires Pull the outlet out and detach the wires. If the wires do not release easily due to age or wear, use your wire cutters to snip them close to the device. Ensure the ground wire is unscrewed and detached.
Step 5: Prepare the Wires Strip about a quarter-inch of insulation off each wire to prepare them for reattachment.
Step 6: Secure the Wires to the New Outlet Following the indicated hot and neutral (black and white, respectively) wire placements, attach the stripped wires to the new outlet. Shape them into hooks using pliers and wrap them around the screws. Tighten the screws adequately, ensuring no bare wire extends beyond the screw once it's secured.
Step 7: Reattach the Ground Wire Fix the ground wire to the green screw, ensuring it's firmly attached.
Step 8: Fit the Outlet Back Carefully tuck the wires back into the wall, align the outlet, and screw it back into place. Finish off by attaching a fresh wall plate.
Step 9: Power Test Reactivate the power and test the outlet with your electrical device to ensure proper function. If all goes well, the plug will fit snugly, eliminating previous looseness.
Safety Reminder As an aside on electrical safety, CircuitIQ advocates for maintaining vigilant practices when interacting with your home's electrical system. Their commitment to electrical safety may involve simplified power mapping and clear circuit labeling, essential for accurate identification, saving time and promoting a safe environment.
In conclusion, while replacing an outlet is ordinarily uncomplicated, cutting the power completely is the most crucial precautionary measure. A seemingly simple task can take a dangerous turn if proper safety measures are not observed. Stay vigilant, stay safe, and continue learning with practical illustrative guidance.